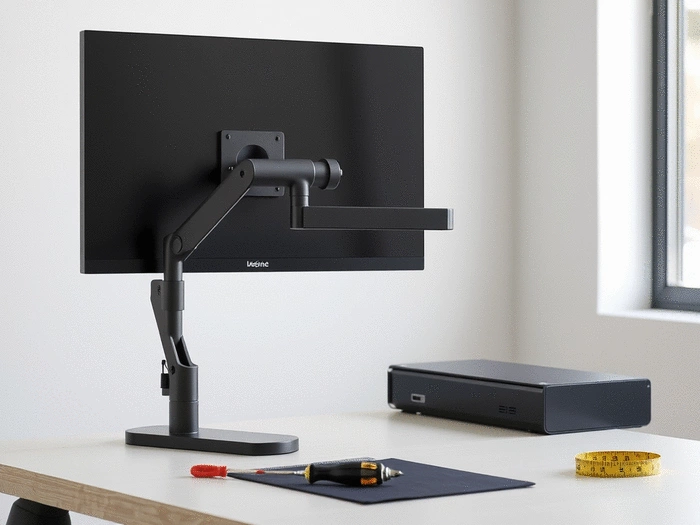
1. Gather Tools and Materials
- ✔ Power drill
- ✔ Screwdriver (flathead and Phillips)
- ✔ Measuring tape
- ✔ Level
- ✔ Stud finder
Subscribe to Tidy Workspace Lab for expert tips and updates on creating a clutter-free workspace.
Posted on: 2025-09-10
By: Maya J. Ellison
Transforming your workspace starts before you even begin the installation. Knowing the right procedures and tools can lead to a streamlined setup and enhanced productivity. Are you ready to elevate your desk environment and optimize your workflow?
Understanding the key steps involved in monitor arm installation can streamline your process and enhance workspace efficiency.
Select between wall mounts or desk mounts based on your workspace needs.
Ensure your setup promotes safety and ergonomic comfort.
👉 Need the big picture? Read the Complete Monitor Arm & Cable Routing Guide.
Align your monitor arm and monitor carefully for a stable installation.
Before diving into the exciting world of monitor arm installation, it’s crucial to set yourself up for success. By preparing adequately, you can avoid common pitfalls and ensure a smooth process. From gathering the right tools to understanding your monitor's compatibility, each step is essential in creating that tidy workspace you desire!
One of the first things I recommend is to take stock of the tools you’ll need. This not only saves you time but also helps streamline the installation process. Let’s look at what you’ll need:
To get started, here’s a quick rundown of the basic tools required for installing your monitor arm. Having everything ready at hand makes the installation much more manageable.
Are you feeling stressed out because of all the co
As the trend of remote work continues to rise, the
In addition to these tools, don’t forget to gather any materials that might come with your monitor arm, such as screws and brackets. And remember, reading the instructions that come with your arm can provide additional insights!
Here’s a quick checklist of those essential tools you’ll want:
Now that we have our tools, let’s talk about a critical aspect of installation: VESA compatibility.
VESA (Video Electronics Standards Association) compatibility is your best friend when it comes to mounting your monitor. Most modern monitors come with VESA mounting patterns, which determine how your monitor will attach to the arm. Knowing your monitor's VESA specifications is essential for ensuring a successful installation.
Check the back of your monitor for a square or rectangular pattern of holes; this is where your arm will connect. If you're unsure, refer to your monitor’s manual or the manufacturer’s website for details. Matching the VESA size with your monitor arm is crucial for stability and safety.
Once you’ve prepared all your tools and understood your monitor’s requirements, it's time to consider how you want to mount your monitor arm. Choosing the right option can significantly affect your workspace's functionality and aesthetic. Let's explore this in detail!
Did you know? Taking a few moments to adjust your monitor arm after installation can significantly improve your workspace ergonomics. Regularly reassess the height, angle, and distance of your monitor to ensure it continues to meet your comfort needs as your working habits evolve.
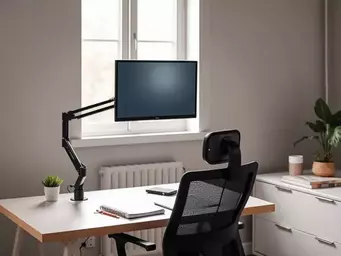
When it comes to setting up your workspace, safety and ergonomics are key factors that can significantly enhance your productivity. At Tidy Workspace Lab, we believe that your desk environment should not only be neat but also promote your well-being. Understanding how to position your monitor correctly can make all the difference in preventing strain and discomfort throughout the day.
Before we discuss the best practices for ergonomic setup, here are some frequently asked questions to help you understand the basics:
Implementing best practices for an ergonomic monitor setup is crucial. A well-arranged workspace encourages good posture and reduces the risk of injuries related to repetitive movements. By optimizing the height and distance of your monitor, you’ll be setting yourself up for success!
Let’s explore some golden rules for maintaining a comfortable and efficient monitor setup. Following these guidelines can help you create a more user-friendly workspace, ensuring that you can work for longer periods without feeling fatigued.
Adjusting your monitor to eye level is essential for keeping your neck in a neutral position. If your monitor is too low, you may find yourself bending forward, leading to discomfort over time. A monitor arm is a fantastic solution here, allowing you to fine-tune the height with ease. This aligns perfectly with our mission at Tidy Workspace Lab—creating an organized workspace that also prioritizes health!
Proper monitor positioning is a key element of an ergonomic workstation. For more detailed guidelines, you can refer to resources provided by organizations like OSHA (Occupational Safety and Health Administration), which offer valuable insights into setting up computer workstations to minimize health risks. You can find more information on their website concerning appropriate monitor components and setup here.
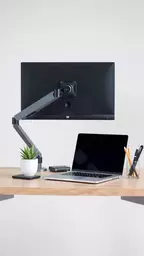
Finding the right distance is often overlooked, but it plays a significant role in your comfort level. If your monitor is too close, it can cause eye strain, while too far away makes it hard to see details. To find your ideal viewing distance, sit comfortably in your chair and extend your arm; the distance from your fingertips to the screen should be roughly where your monitor sits!
Lastly, let's not forget the overall ergonomics of your desk setup. Consider how your keyboard and mouse are positioned as well. Keeping them at a similar height as your elbows can help maintain a relaxed position. Too high or too low can cause you to reach uncomfortably, leading to fatigue. Remember, a tidy workspace is not just about organization but also about making sure you feel great while you work!
As we wrap up our discussion, it's essential to keep in mind that a proper monitor arm installation is just the beginning. I encourage you to revisit the steps we discussed earlier to ensure a smooth setup. Each adjustment you make now can lead to a more pleasant work experience in the long run!
For those starting their journey with monitor arms, here’s a quick recap of the installation steps:
Feel free to take your time with each step; after all, the goal is to create a workspace you love! If you have any questions or experiences to share, don’t hesitate to reach out. I love hearing from you!
At Tidy Workspace Lab, we are constantly updating our resources to help you achieve the best workspace possible. If you're ready to dive deeper into monitor arm options, consider checking out our reviews of different brands and product features. Each selection is aimed at enhancing your workspace and encouraging a cleaner, more organized environment. Your journey to a tidy, efficient workspace starts here!
Take the next step by exploring various monitor arm brands. Look for features like adjustability, weight capacity, and user reviews. Choosing the right arm can make your workspace feel like a dream come true! And remember, a tidy workspace isn't just about looks; it's about creating a space that boosts your productivity and well-being.
Here is a quick recap of the important points discussed in the article: